
Toasted Smores Brownies With Homemade Marshmallow
It doesn’t get more decadent than this. Making marshmallows was much easier than expected and makes a big difference. Give it a try!
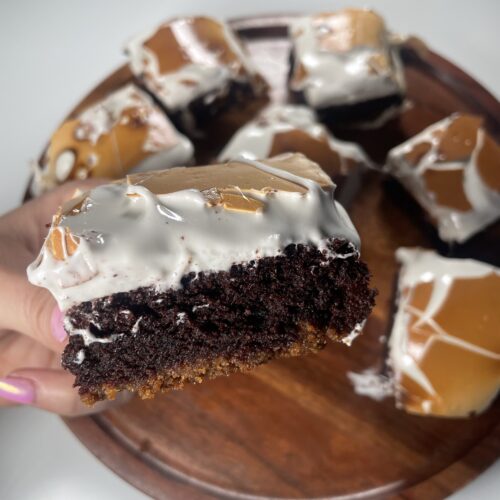
Chewy Smores Brownies With Torched Homemade Marshmallow
These are as decadent as it gets. Rich cocoa powder, soft marshmallows, delicious graham cracker crust. It's the perfect combo!I've always been intrigued by homemade marshmallows but always wrote it off as being way too complicated to make. "there's no way I can make that". Well, guess what? It was pretty easy and I made it! And they are SO much better than store bought. If there is one thing I strongly urge against it would be to buy marshmallows for this. You need the soft homemade kind or it just wont be the same.I made this recipe over two days: first the brownie and then the next day the marshmallows. These are 100 times best served with the marshmallows being freshly made. When they are torched, the top layer has this UNREAL little delicious marshmallow crunch that you will only capture fresh out of the oven. The little crunch dies out pretty quickly and it would be sad to miss it.i've listed in equipment two must haves for this recipe to be successful: a thermometer and parchment paper
Equipment
- 1 thermometer you need this for the marshmallow making
- Parchment Paper
Ingredients
Graham Cracker Cruster
- 2 cups Graham Cracker Crumbs
- 1/3 cup Butter, Melted
- 1 tsp Cinnamon
Brownie
- 1/2 cup Butter
- 1 cup sugar
- 1/2 cup Dutch Process Cocoa Unsweetened
- .5 tsp Salt
- 1 tsp Vanilla
- 2 Eggs
- 1/2 cup AP Flour
Marshmallows
- 2 Gelatin Powder packets
- 1/3 cup Water (room temp or cool; NOT warm)
- .5 tsp Salt
- 1.5 tsp Vanilla paste you can use regular vanilla too, i just love seeing the little vanilla spots in the marshmallow. it makes the flavor stronger.
- 1 cup Sugar
- 1/4 cup Corn Syrup, Honey or Agave
Instructions
- Preheat oven to 350 degrees. Line a 8x8 pan with parchment paper.
- If you havent done so, you can use a food processor or put your graham crackers into a ziploc bag and beat with something until they are finely turned into crumbs. Combine the crumbs, cinnamon and butter and mix well. Press into the bottom of the pan. Set aside
- Let's make the brownies. Melt the butter in the microwave. in your mixing bowl, add melted butter and then add the sugar. Whisk mixture together for two minutes. Add the eggs and continue to mix for another two minutes.
- Add the cocoa, flour, vanilla and salt. Combine until fully mixed, being sure to not overmix. Just 1-2 minutes until smooth.
- Pour your brownie batter onto the graham cracker rust and spread evenly. Bake for 20-25 minutes.
- Let the brownies cool down completely and then set them in the fridge to chill.
- Let's make the marshmallows. Combine the gelatin, water, salt and vanilla in your bowl. Stir ingredients lightly and let it sit. It's going to start getting a little hard.
- Meanwhile, on your stovetop combine sugar and your corn syrup and another 1/3 cup of water. Stir to combine. Set it over medium heat. This is where you need the thermometer. You want it to reach 250 F. It will take a good 10 minutes.
- once you have reached the 250F, turn off the heat and remove. Turn on your mixer where the gelatin mixture is. Slowly pour in the hot sugar little by little. It will take a while but it will eventually turn it into a fluffy white mix. It should take about 10 minutes. Make sure your mixer is on a medium speed.
- Once the mixture is thick and spreadable, spread it over the brownies. Cover and place back in the fridge. The gelatin needs to firm up. You can do this for a minimum of 2 hours or overnight.
- Once you are ready to serve, turn your broiler on. Make sure your oven tray is placed on the highest level as you want the brownies right under the broiler. Broil for just 1-2 minutes. Keep an eye on it as you don't want them to burn. You want to see a little brown toasty color form but that's it.
- To serve, use a large knife. You may want to spray it with non stick spray.